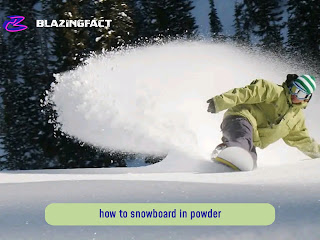
How to Sharpen Snowboard Edges With steps
Taking care of your snowboard is essential if you want to enjoy a smooth ride on the slopes. Neglecting its maintenance can result in rusted edges and difficulties in carving or maintaining control on hard-packed snow. Just like a piano key needs to be tuned, a snowboard requires regular "tuning" to stay in optimal condition. This tuning process includes repairing the base, waxing, and sharpening the edges.
You'll need the right tools if you prefer to sharpen your snowboard's edges at home. These include a screwdriver and an edging tool, which can sometimes be found as a file and file guide set. To sharpen the edges, you'll need to adjust the angle and work from the nose to the tail of the snowboard.
Even if you've been diligent about drying your board after each snowboarding session, it will still require tuning. With regular use, the edges of your snowboard become dull, rounded, or develop nicks and burrs, regardless of how careful you've been. A freshly sharpened edge should be sharp enough to scrape a bit of your fingernail. In contrast, a dull edge will allow you to run your fingers along it without causing any injury unless there's a noticeable nick.
 |
| How to Sharpen Snowboard Edges With steps |
Why is it Important to Sharpen Your Snowboard Edges?
When you're snowboarding, having sharp edges on your snowboard is crucial. These edges help you to cut through the snow effectively and provide the necessary grip for better control. Think of it like a knife cutting through butter. If the knife is dull, it will slide and slip, making it harder to control. The same principle applies to snowboard edges.
Over time, even with proper care, the edges of your snowboard naturally become dull. This happens because they come into contact with the snow, and sometimes they may encounter small rocks hidden beneath the surface. These encounters can cause minor damage to the edges, making them less effective at gripping the snow.
However, it's not just usage that affects the sharpness of your snowboard edges. Improper storage can also lead to damage. You should never place a wet snowboard down on its base or side. Doing so traps moisture, which can lead to rust formation. Similarly, avoid storing a wet board in its bag, as this can also seal in moisture and cause rust.
Another mistake to avoid is storing a wet snowboard on its end. When water runs down from one end to the other, it can cause rust on the opposite end. Instead, it's best to dry off your snowboard properly. One effective way is to set it down on the bindings, allowing any excess moisture to run off and the board to dry naturally without trapping moisture and promoting rust formation.
Taking care of the edges of your snowboard is essential for maintaining optimal performance on the slopes. By sharpening the edges regularly and ensuring proper storage, you can enhance your control and overall snowboarding experience.
Tools Needed For Tuning A Snowboard?
To tune your snowboard and give it the best performance on the slopes, you'll need a few tools. Let's examine what you'll need and why each tool is important.
- Screwdriver: This tool is handy for removing and adjusting the bindings on your snowboard. You may need to loosen or tighten the screws that hold your bindings in place, so having a screwdriver with the right size and head type is essential.
- Snowboard Edging Tool: This tool is specifically designed for sharpening the edges of your snowboard. The edges play a crucial role in your board's ability to grip the snow and provide control while turning. With the edging tool, you can maintain the sharpness of your edges and ensure optimal performance in different types of snow conditions.
- Worksurface: A worksurface, such as a sturdy table or workbench, is necessary for providing a stable and flat area to work on your snowboard. It's important to have a clean and organized space to comfortably place your snowboard and perform the necessary tuning tasks.
- Vice (optional): While not absolutely necessary, the vice can be helpful for securing your snowboard in place during the tuning process. It holds the board steady, allowing you to work on it more efficiently. If you don't have a vice, you can still tune your snowboard by placing it on a non-slip surface or using other means to stabilize it.
In addition to the mentioned tools, you may also come across a file guide and a file as alternatives to the snowboard edging tool. These tools serve the same purpose of sharpening the edges, but they require a bit more precision and skill to use effectively. If you're new to snowboard tuning, using the all-in-one snowboard edging tool is recommended, as it simplifies the process and makes it easier for beginners.
Sharpening Your Snowboard's Edges
When taking care of your snowboard, there's more to it than just sharpening the edges. If you're going to invest time in this task, why not give your board a thorough tune-up? This involves sharpening the edges, repairing any nicks on the board, and giving it a proper hot wax treatment rather than a quick cold wax job that people usually do between rides. Since you're already taking the bindings off, you should go the extra mile to ensure your board performs at its best.
However, before diving into other tuning processes like waxing, it's crucial to start by sharpening the edges of your snowboard. Here's a step-by-step guide to help you accomplish this:
Step 1 – Removing Your Snowboard's Bindings
To avoid any interference or accidental damage while working on your board, it's best to remove the bindings. Additionally, if you plan to apply a hot wax treatment, it's important to keep the bindings away from the heat. Take a screwdriver and carefully detach them from the board.
Step 2 – Sharpening Your Snowboard's Edges
There are various edge tools available on the market, some of which come in two separate pieces—a file and a guide. However, if you're new to this process, opting for an all-in-one snowboard edger is recommended. These tools make your life easier by ensuring a consistent angle throughout the length of the board.
Using the snowboard edger, gently run it along the edges, maintaining a steady pressure. This helps remove any burrs, nicks, or dullness on the edges, resulting in sharper and more responsive turns on the slopes. Remember to work on your snowboard's base and side edges for comprehensive sharpening.
Set Your Angle For Your Snowboard's Edge
First, you need to determine the angle at which you want to set your snowboard's edges. Thankfully, there is a convenient all-in-one device that can assist you with this. However, if you're using a file on its own, you'll need to set a guide to ensure that the file stays at the correct angle.
The angle you choose should reflect your skill level as a snowboarder. For beginners and those at a low-intermediate level, a 90-degree angle is the least aggressive option. As you become more advanced, you'll move away from 90 degrees and towards a smaller angle, typically ranging from 90 to 85 degrees.
Many people find it beneficial to draw the angle along the entire edge. This serves as both a guide and a marker to indicate when you've successfully filed off the designated area.
Sharpening the Snowboard Base Edge from Nose to Tail
To begin, make sure your snowboard is flat. Start at the nose of the board, specifically at its widest point, and gradually work your way down to the tail, stopping again at the wide point. Apply light pressure as you move the file along the edge, ensuring that it glides smoothly along the board's surface. Repeat this process a few times to achieve the desired sharpness.
Remember these key points:
- Keep the snowboard flat throughout the process.
- Always move the edging tool in one direction.
- Maintain light pressure on the file.
- Avoid attempting to sharpen the rounded ends of your board.
- If you encounter any rough or sticking spots, they are called "burrs" and require extra attention with the file.
- You'll know that the edge is adequately sharp when you can run your fingernail over it, and a thin piece peels away.
Sharpening the Snowboard Side Edge
Once you've sharpened the base edges to your satisfaction, it's time to focus on the side edge. Set your tool according to the recommended settings or measurements provided. For most situations, a 90-degree angle is suitable for the side edge. However, some riders prefer to adjust the angle to 89 degrees in more aggressive or hard snow conditions.
Similar to the base edge, always move the file in one direction and pay attention to any sticking areas that may have burrs. Take your time to ensure a thorough sharpening.
Can I Repair My Snowboard's Edges?
Sometimes the edges of your snowboard can get damaged in a way that simply sharpening them won't solve. When this happens, you need to perform a kind of "surgery" on your board. This involves removing a portion of the base, taking out the damaged section, installing a new piece, ensuring it's even with the rest of the board, and then filling the base.
Some people choose to repair their snowboard edges on their own, and it is indeed possible. However, if you're not familiar with the process, you might accidentally damage the base or end up with an uneven edge. Therefore, if you're new to DIY snowboard repairs, it's recommended to have professionals handle this particular task.
Conclusion
sharpening the edges of a snowboard requires taking your time, setting the correct angle, and applying consistent and gentle pressure. It can be helpful to mark the angle to maintain accuracy and use the "fingernail trick" to determine when you've achieved the desired sharpness. However, if there's a substantial chunk missing from the edge that cannot be fixed with a file, it's advisable to take your snowboard to a professional who can replace that section for you.